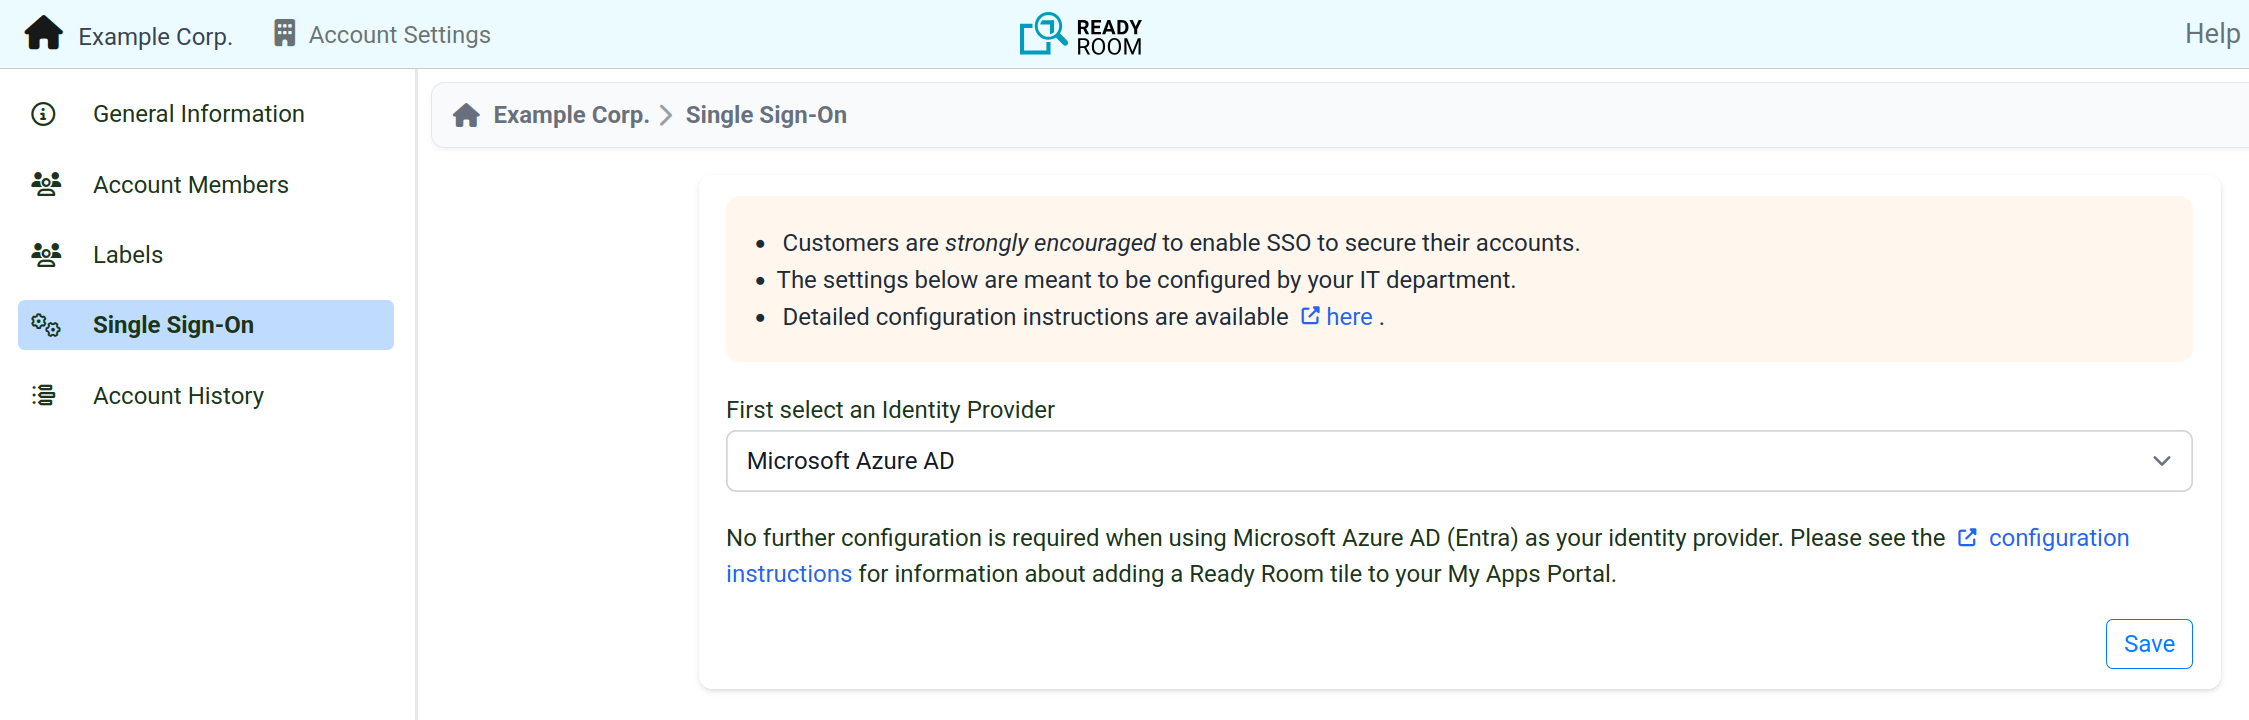
Select Microsoft Azure AD
from the Select an Identity Provider
dropdown and click the Save Changes
button. No further Ready Rooom configuration is required.
Follow these
instructions
from Microsoft to add Ready Room to your
Microsoft Entra tenant. Ready Room has been added to the
Microsoft Entra Gallery
to make adding it easier.
If this is your first time configuring Ready Room for Okta, you will need to create a new application in your Okta tenant. To do so, complete the following steps:
-
Login to the Okta admin console and navigate to
Applications/Applications
from the menu on the left.
-
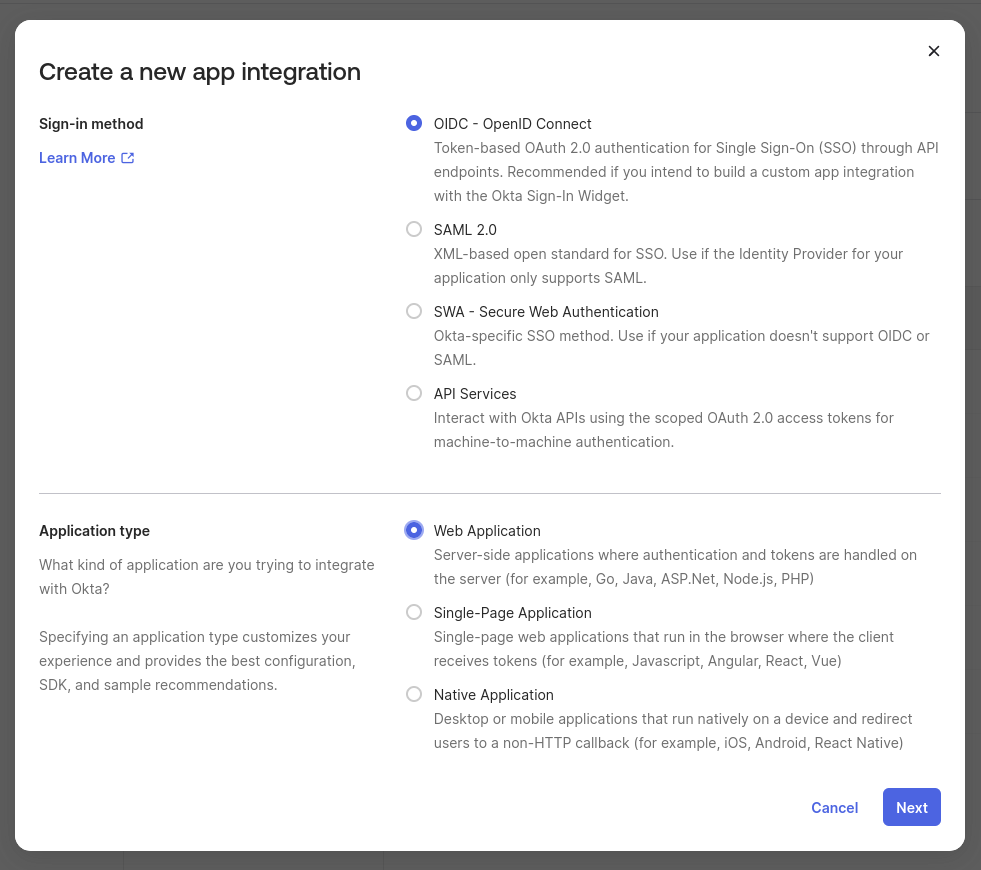
Click the Create App Integration
button and select OIDC - OpenID Connect
as the Sign-in method and Web Application
as the Application type. Then click Next.
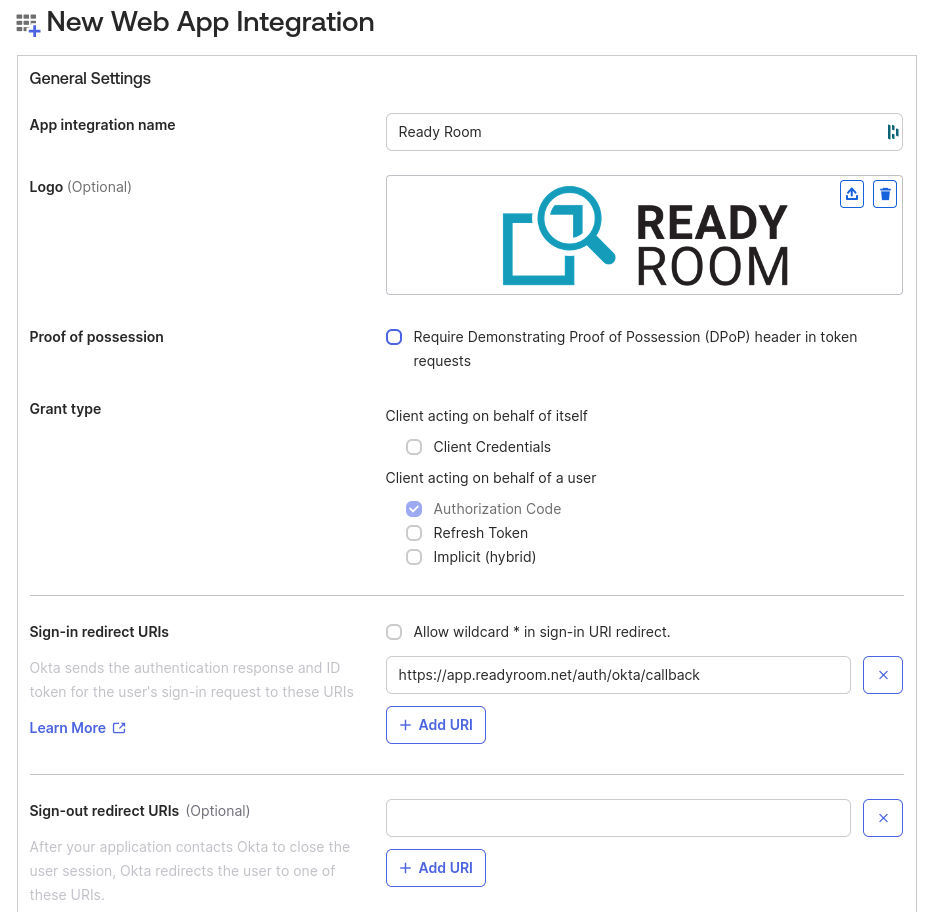
You will be directed to the New Web App Integration
page, where you will need to enter the following settings:
App integration name
Ready Room
Logo URI
Sign-in redirect URIs
https://app.readyroom.net/auth/okta/callback
Sign-out redirect URIs
Leave blank
Ignore the Trusted Origins
section and complete the Assignments
section as appropriate for you at this time, then click Save.
On the following screen, in the General
tab, scroll down to the General Settings
section and click Edit.
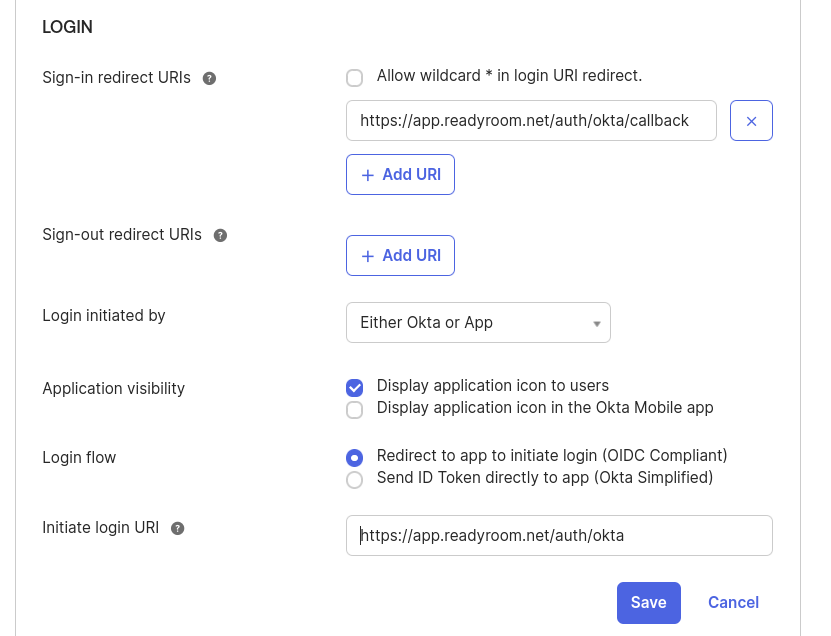
In edit mode, scroll down some more to the Login
section and set the following fields:
Login initiated by
Either Okta or App
This will cause some new settings to appear. Set them as follows:
Application visibility
Display application icon to users
Login flow
Redirect to app to initiate login (OIDC Compliant)
Initiate login URI
https://app.readyroom.net/auth/okta.
Click Save.
In a new tab or window, login to Ready Room as an administrator and navigate to
Account Settings / Single Sign-On
from the navigation bar.
Select Okta
from the Select an Identity Provider
dropdown. You will be asked to enter your Okta issuer (domain), client ID, and client secret.
These can all be found on the General
tab of the Okta application you created in the previous steps. See image below.
IMPORTANT! When entering the domain, add only
the domain. Do not prepend a scheme (e.g. "https:"") or add any additional path components.
In the image below, the domain is "example.okta.com"
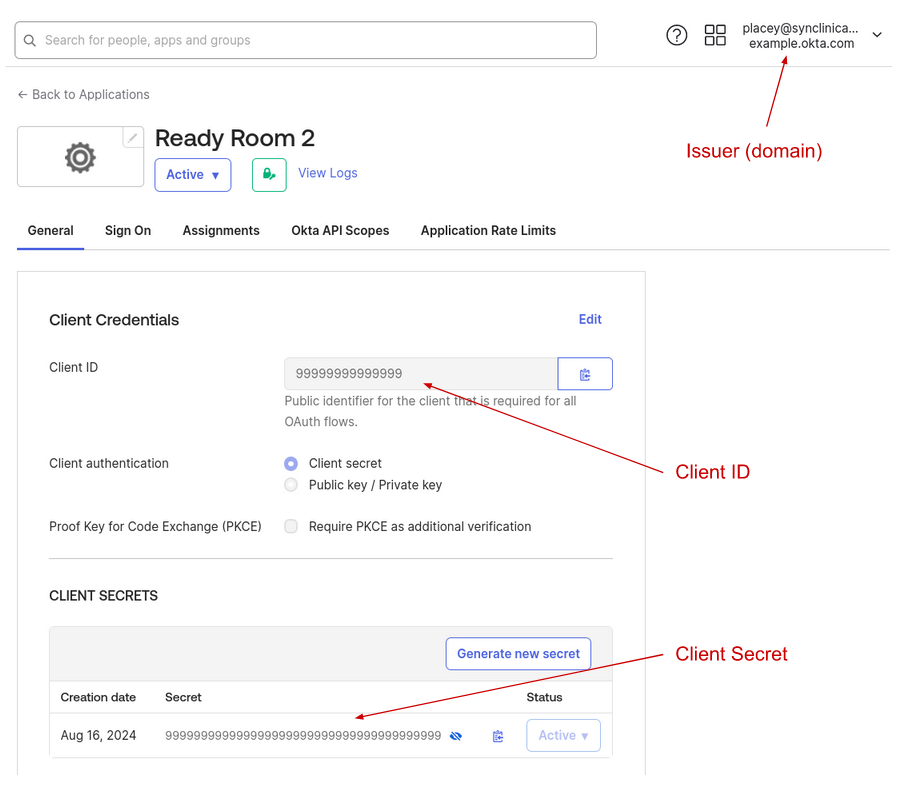
At this point, you should be able to login to Ready Room with your Okta account. Don't forget to add users or groups to the Okta Ready Room application.
If this is your first time configuring Ready Room for Duo, you will need to create a new application from your Duo Dashboard.
To do so, reference the information below, while following these instructions from Cisco Duo: https://duo.com/docs/sso-oidc-generic.
Relying Party
Grant Type
Do not select the "Allow PKCE only authentication" option.
Leave the Access Token Lifetime at 60 minutes.
Do not select the Refresh Tokens option.
Sign-in Redirect URIs
Add a single Redirect URI: https://app.readyroom.net/auth/duo/callback
OIDC Response
Scopes
Make sure both the profile
and email
scopes are selected. The values should be exactly as shown in the Cisco Duo instructions.
Additional Scopes
Do not add any additional scopes.
Claim Transformations
Do not enable claim transformations.
Universal Prompt
Set as you see fit.
Policy
Application Policy
Not required.
Global level policy
Set as you see fit.
Settings
Name
Ready Room
All futher settings can be left as default.
One you have completed the Duo configuration, In a new tab or window, login to Ready Room as an administrator and navigate to
Admin / Account Settings
from the navigation bar.
Select Duo
from the Select an Identity Provider
dropdown. You will be asked to enter your Duo issuer, client ID, and client secret all of which can be found at the top
of the Duo application you created in the previous steps.
At this point, you should be able to login to Ready Room with your Duo account. Don't forget to add users and groups to the Duo Ready Room application.