Single Sign-On Setup
Okta Single Sign-On Instructions
Before you begin
The following information pertains to all single sign-on users regardless of identity provider (IdP).
- Ready Room uses the OpenID Connect (OIDC) standard to enable single sign-on (SSO).
- Once SSO is enabled, any existing users can only use SSO to authenticate to Ready Room, their Ready Room-managed credentials will no longer be accepted.
- You should consider limiting which users can access Ready Room at the IdP level. It's very likely you do not want to offer access to all employees.
- Any user that can access Ready Room will have their Ready Room account created automatically. IdP-managed users do not have to be added to Ready Room first.
- SSO-enabled users cannot change their name, email address, or password. Those settings are managed by your IdP. If a user’s name changes in the IdP, it will be reflected in Ready Room on their next login.
- There are buttons on the login screen that can be used to login to Ready Room via SSO, but administrators are strongly encouraged to add a Ready Room tile to your IdP’s application launcher.
- Only Ready Room administrators can enable SSO.
Prerequisites
Administrative Access
In order to enable single sign-on via Okta, you must have admin access to both the Okta Console and Ready Room.
Supported Features
Authentication Flows
- Service Provider (SP)-Initiated Authentication - This authentication flow occurs when the user attempts to log in from the Ready Room login page.
- Identity Provider (IdP)-Initiated Authentication - This authentication flow occurs when the user attempts to log in to Ready Room from the My Apps section of the Okta End User Dashboard
Part 1
Add Ready Room from the Okta App Catalog
-
1
Open Catalog
Login to the Okta admin console and navigate to Applications and Resources → Applications from the menu on the left, then click the Browse App Catalog button.
Click to enlarge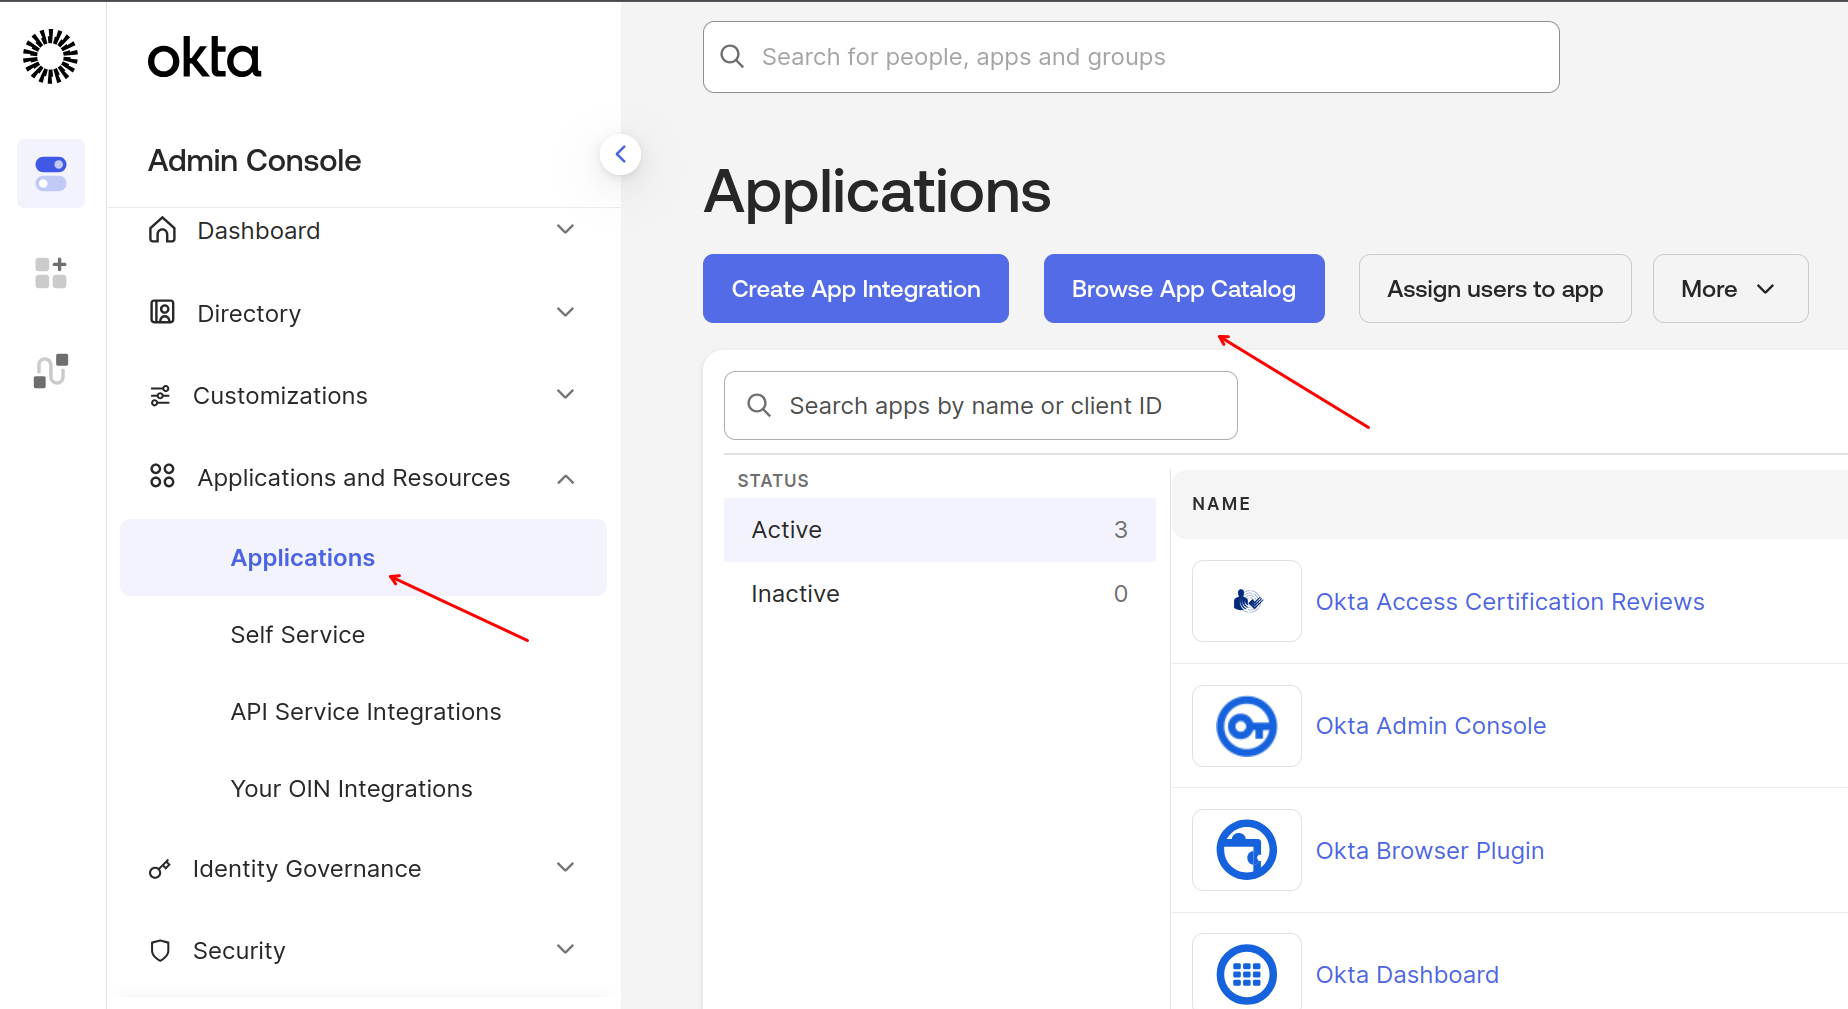
-
2
Search for Ready Room
On the next screen, type "Ready Room" into the search box and click on the Ready Room app when it appears.
Click to enlarge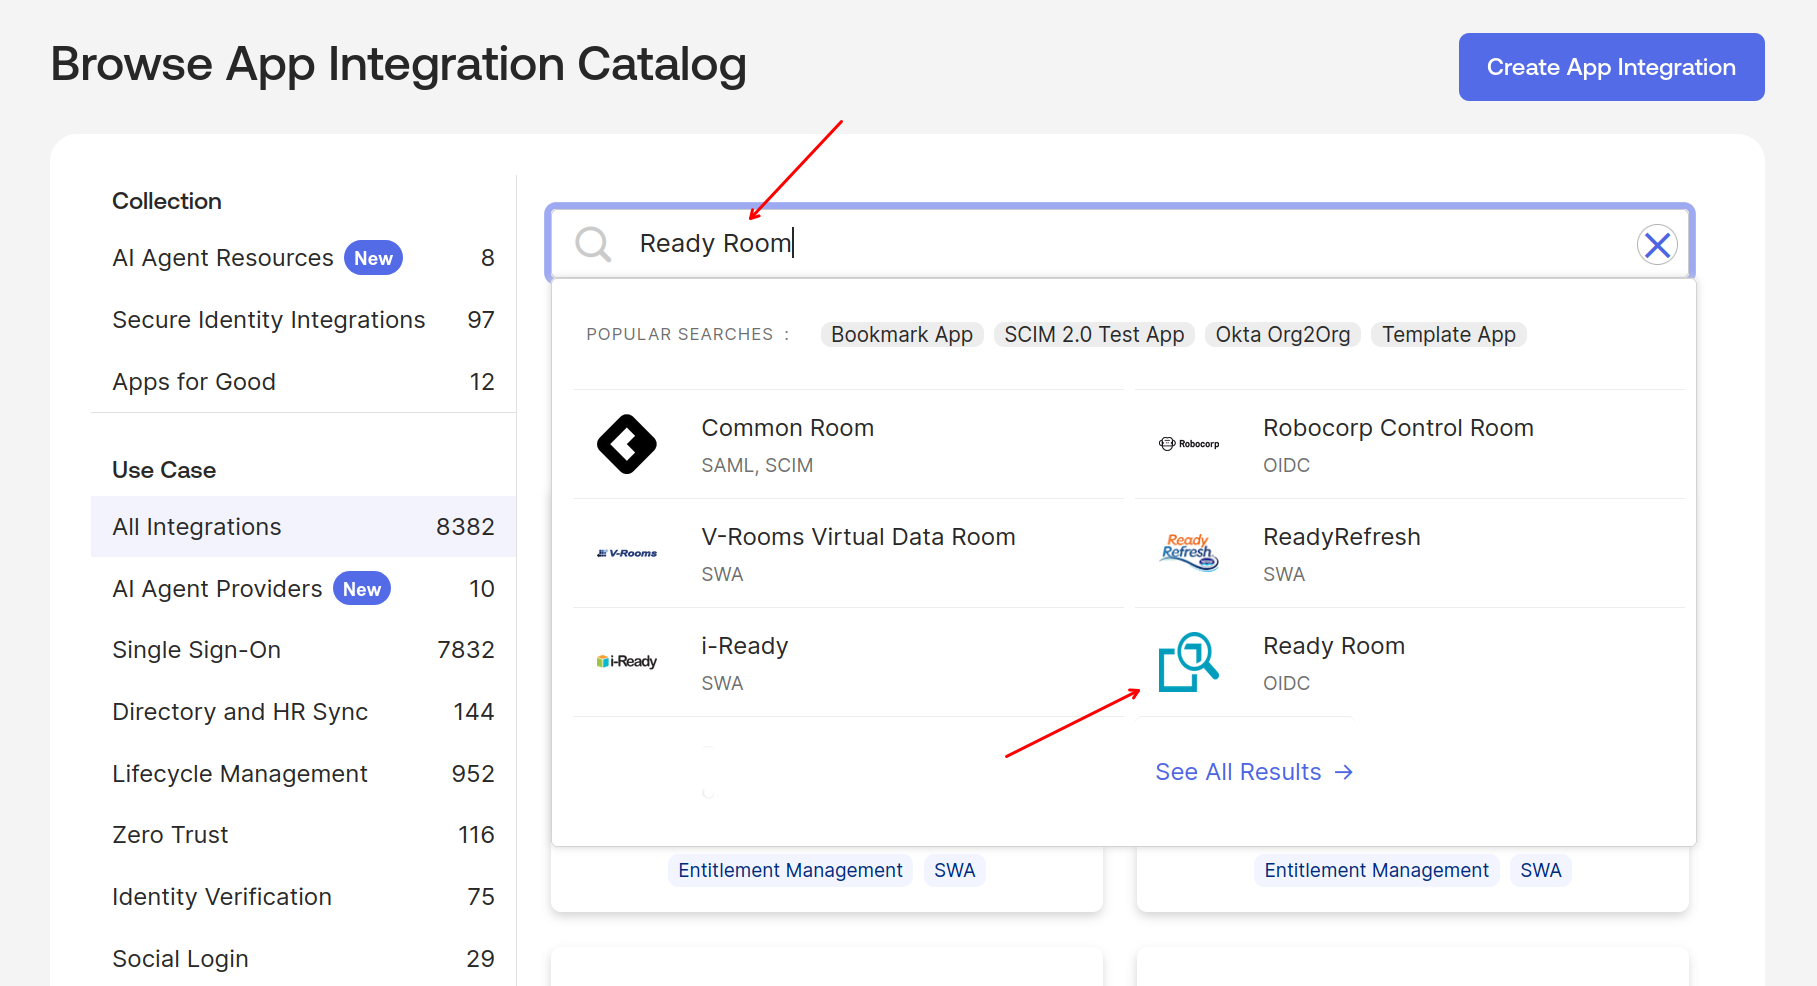
-
3
Add Integration
From the Ready Room summary page, click Add Integration.
Click to enlarge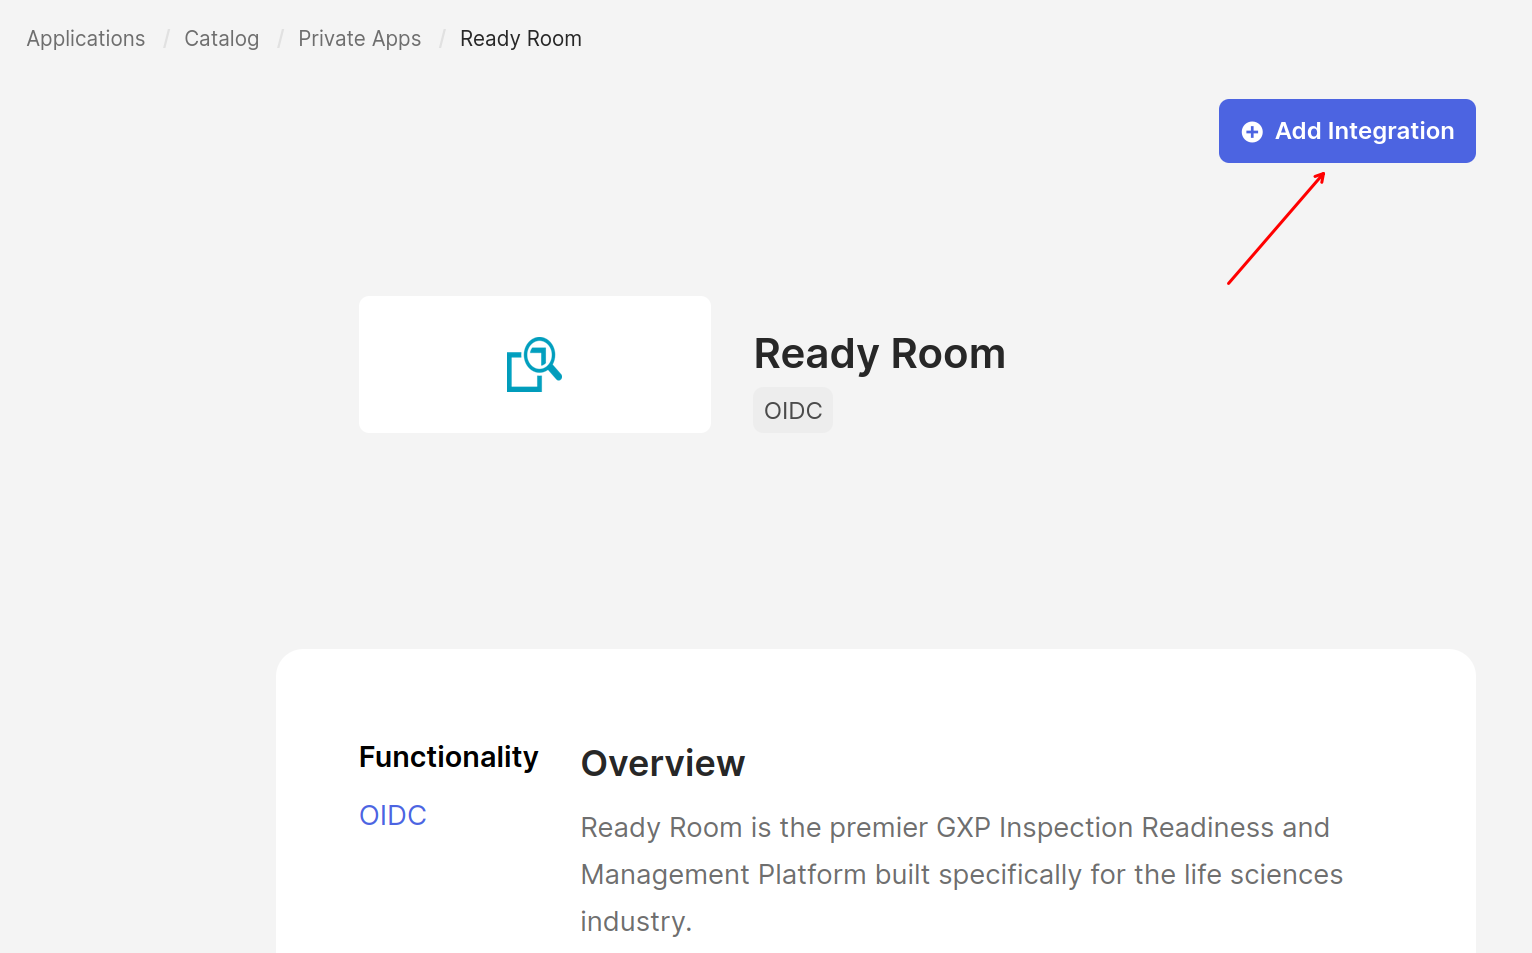
-
4
Complete Settings
You will be directed to the General Settings form. Nothing is required here. Just click Done
Click to enlarge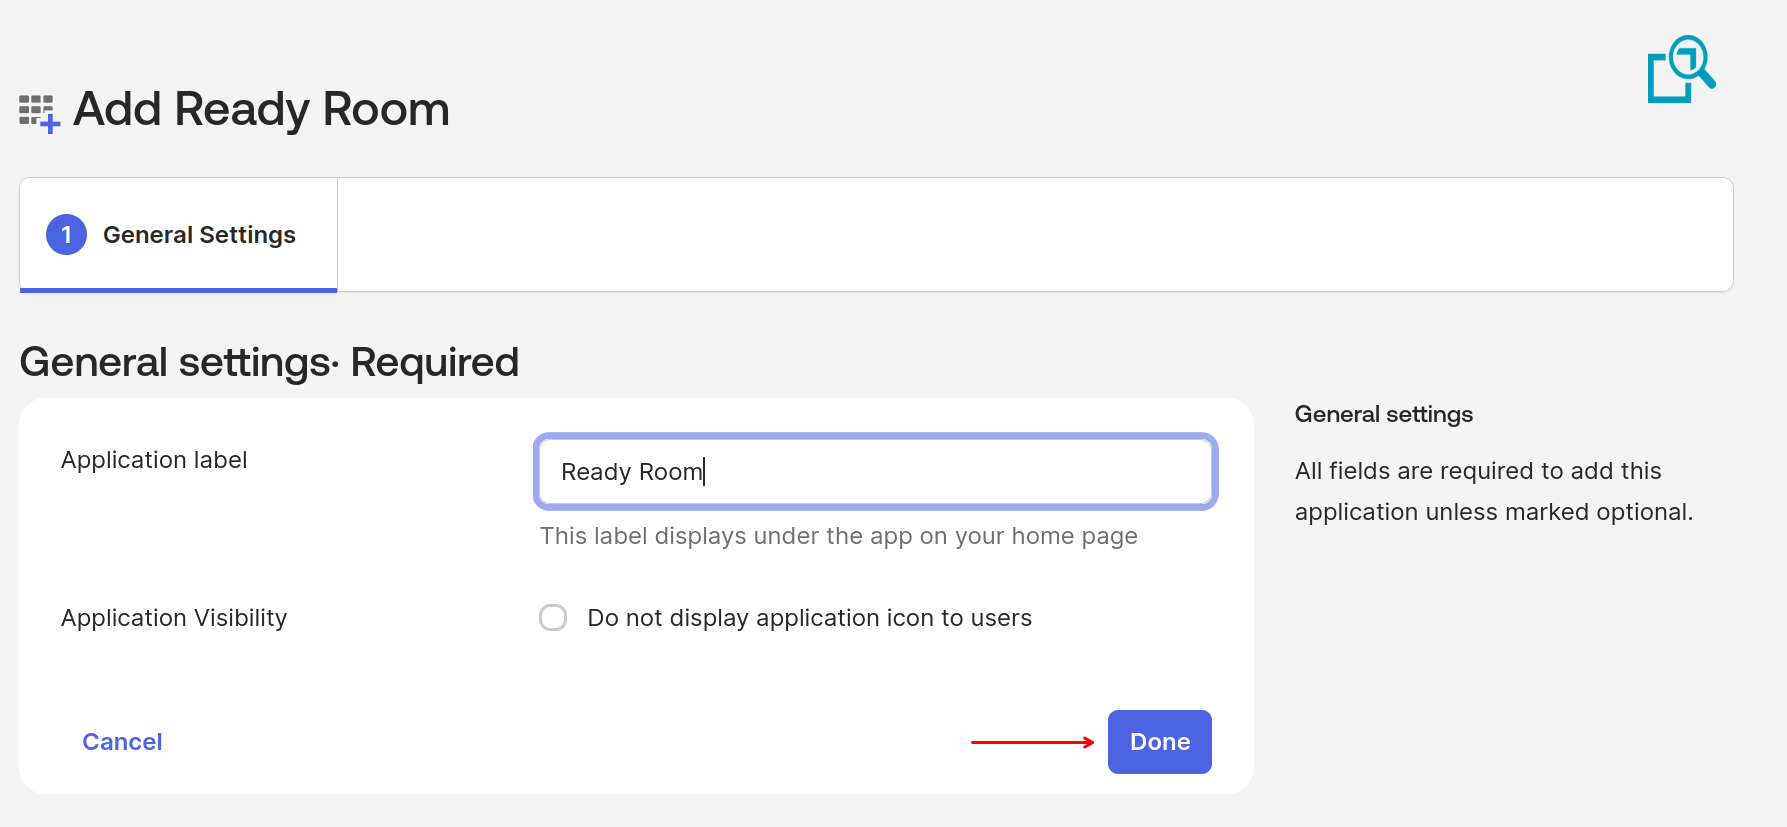
The Ready Room App Integration has been added to your Okta tenant. Now you need to tell Ready Room about it.
Part 2
Connect Okta to Ready Room
-
7
Copy App Integration Credentials
From the newly added Ready Room App Integration in Okta, open the Sign On tab.
Click to enlarge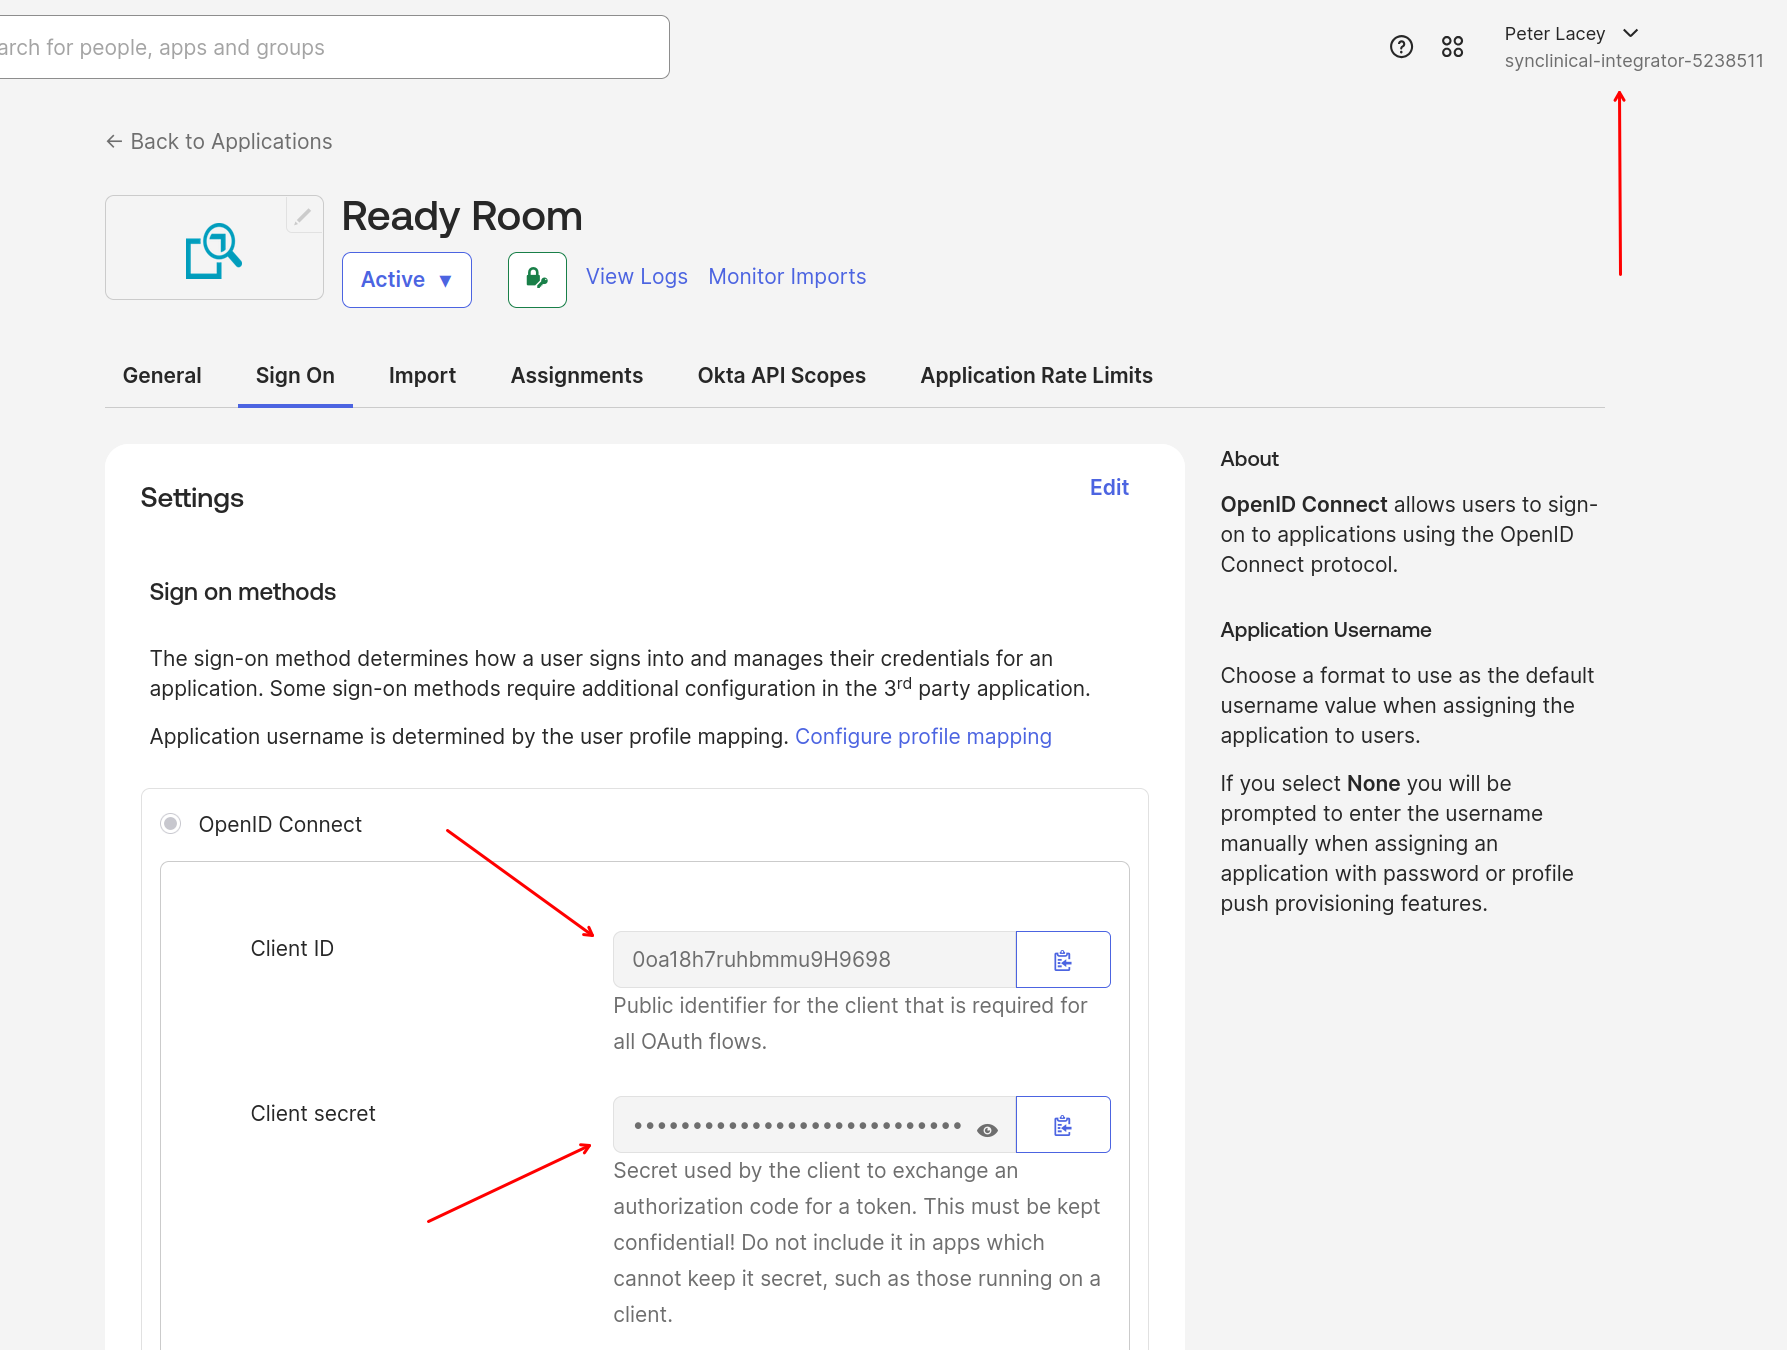
-
7
Open Account Settings
Leave the Okta admin console open and in a new tab or window login to Ready Room as an administrator. Click your name in the upper right hand corner and select Account Settings from the dropdown.
Click to enlarge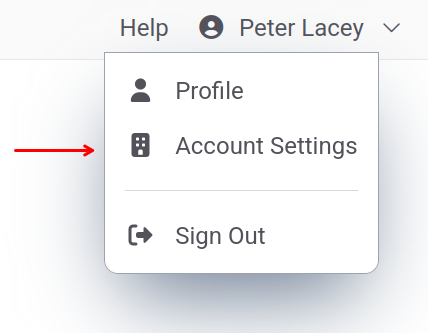
-
8
Enter your Okta details
- From the menu on the left select Single Sign-on
- Select Okta as an Identity Provider
- Enter your Okta issuer (domain), Client ID, and Client Secret. These can all be found on the General tab of the Okta application you created in the previous steps. See image below.
- Click Save
Important
When entering the domain, add only the domain. Do not prepend a scheme (e.g. "https://") or add any additional path components. In the image below, the domain is
example.okta.comClick to enlarge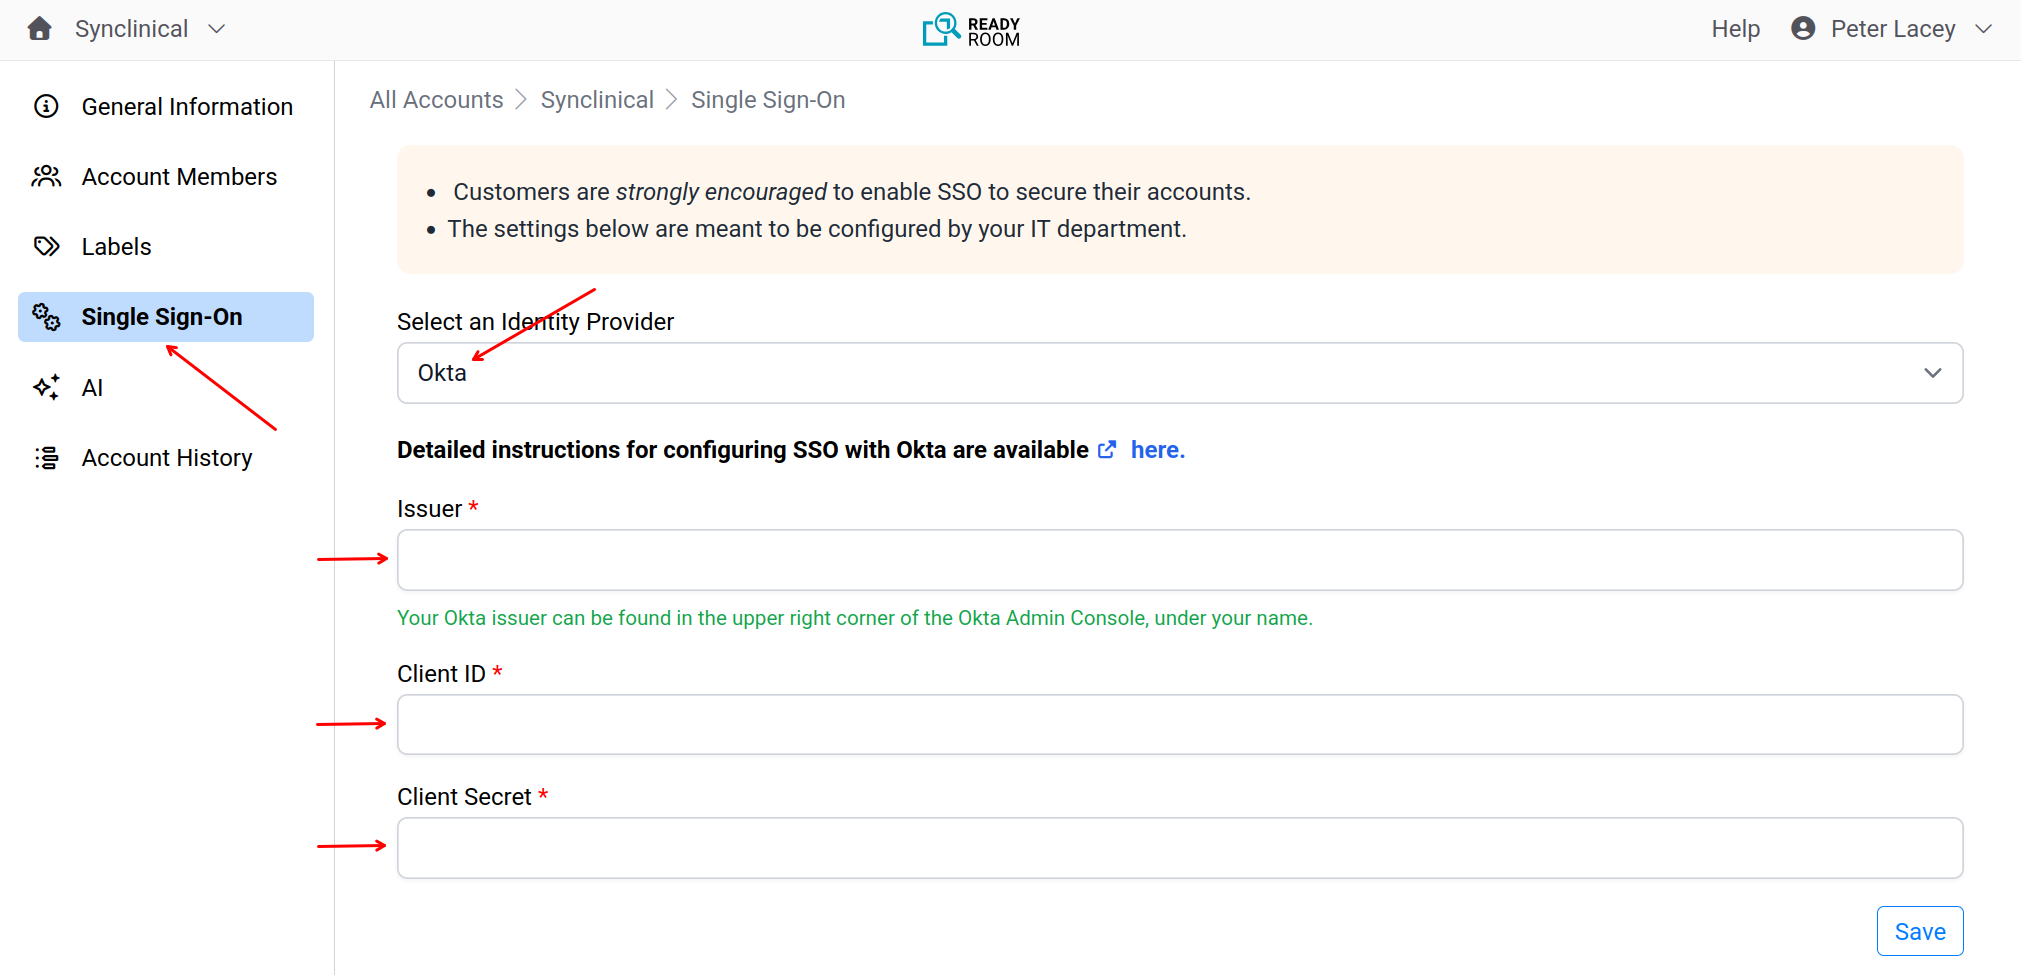
You're all set
At this point, you should be able to login to Ready Room with your Okta account. Don't forget to add users or groups to the Okta Ready Room application.
Logging In
SP-Initated Login
In general, it's easier for users to access Ready Room from the Okta dashboard. However, you can also do so from the Ready Room login screen.
- From your browser, navigate to the Ready Room sign-in page.
- Click the Okta button, enter your email address, and click "Login with Okta".
If your credentials are valid, you are redirected to the Ready Room home page.